Set up TicketBot
This page covers the shortest path to a working ticket setup: invite the bot, create subjects, and send a panel.
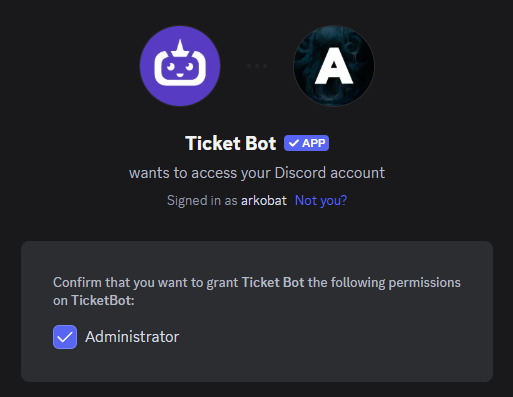
1. Invite TicketBot to your server
Invite the bot via the website, or from the dashboard sidebar using Invite Bot.
For simplicity, we recommend giving the bot ADMINISTRATOR permissions. TicketBot can run with fewer permissions, but only if your permission setup and role hierarchy are correct.
Setup permissions manually
If you choose to configure permissions manually, be aware that both specific permissions and role hierarchy must be properly set up for the bot to function correctly.
Role Hierarchy: The bot's role must be positioned above all roles that need to interact with the bot. For example, if the bot role is below a moderator or admin role, the bot cannot add members with those roles to tickets or manage their permissions for ticket visibility.
Required Permissions: The bot requires the following permissions to fully function:
- Manage Roles – Change who can see tickets
- Manage Channels – Create and manage ticket channels
- Read Messages/View Channels – Access ticket channels
- Send Messages – Send messages in tickets
- Read Message History – Read ticket messages
- Embed Links – Display formatted messages
- Attach Files – Upload files to tickets
- Mention @everyone, @here, and All Roles – Mention roles that are set up
- Manage Messages – Manage ticket content
- Add Reactions – Add reaction buttons to messages
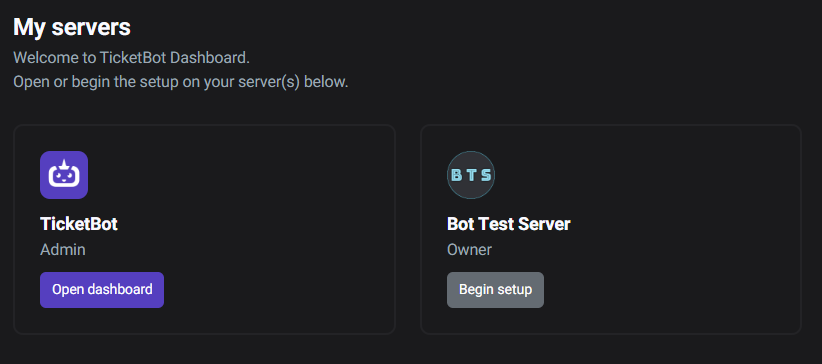
2. Open the dashboard and pick a server
Open the dashboard and go to My Servers, then pick the server you want to configure.
If you have admin access on that server, you’ll see configuration pages like Subjects, Panels, and Server Settings.
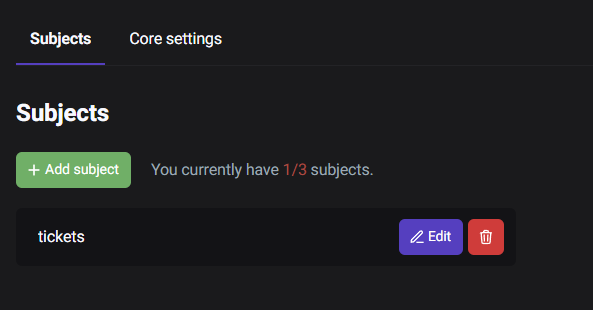
3. Create subjects (ticket types)
Go to Subjects. You’ll start with a default subject; you can rename it and add more.
In order to categorize tickets, you must have one or more subjects. Every ticket that you or your server members create on your server must be a part of a subject.
Read more: Subjects
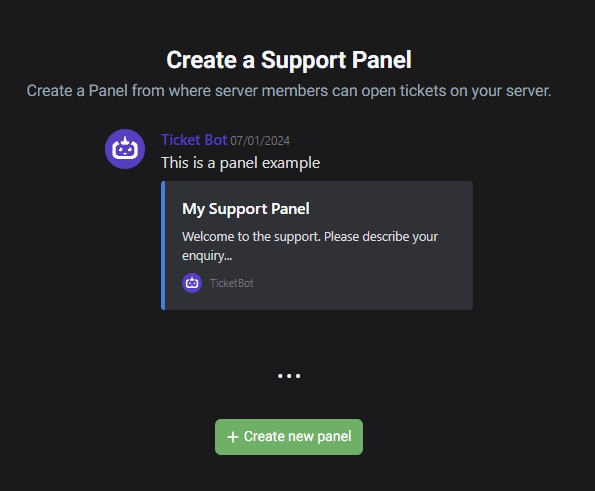
4. Create a panel
When you have created your desired amount of subjects, you are ready for the next and final step.
Panels let users open tickets without typing commands. A panel is a message with buttons or a dropdown; each item can open a ticket under a selected subject.
Read more: Panels
Next steps
At this point you should have:
- At least one subject
- A panel sent to a channel
- A working ticket flow in Discord
If you have questions, join our Discord support server and open a ticket with us.